Showing posts with label Baby Food. Show all posts

Friday, January 28, 2011

Baby Food Friday: Avocados

Yes! Avocados! It has become a good "first" food for babies. Avocados are super easy to prepare as well!

When selecting an Avocado, you want a dark green color with bumpy texture. The fruit should be firm yet yielding when gently pushed.

When an avocado is sliced in half, the flesh color should be a green that gently transforms into a buttery yellow around the pit.

I have not found Avocados to freeze well once pureed, so I freeze them in slices.
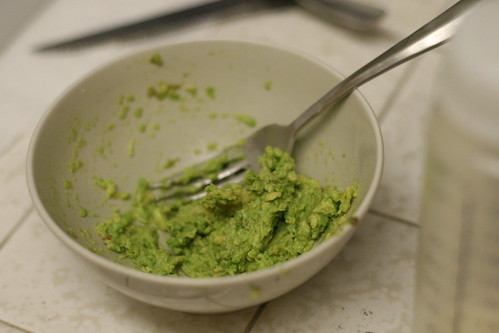
Avocados - NO NEED TO COOK

  • Cut Avocado in half, remove pit.
  • I cut the halves in half again (so I have four pieces total)
  • Remove the peel (no need to use a spoon unless you want to)
  • Place on a baking sheet and into the freezer.
  • Once frozen, place into a freezer bag.
  • When you need to use one, pull out of the bag, heat up (I start with 30 seconds) and mash up.
Cost: $.45/avocado
Amount: 4 slices

When she was younger, I used 1 slice, now I use 2. So I'm paying $.22 for a meal!

Savings:
Not comparable (doesn't come in a jar)

Friday, January 21, 2011

Baby Food Friday: Sweet Potatoes

Sweet Potatoes were Rilyn's first food and it has become my favorite and one of the easiest foods to prepare!

Sweet Potato Puree (I use two - four large sweet potatoes which lasts me 2-4 weeks depending upon how thin my puree is)
I know other people prepare it differently but I have found this to be the EASIEST because the peel comes right off!

  • Wash sweet potatoes.
  • Use a fork to poke holes all over the sweet potato.
  • Run the potato under water again and IMMEDIATELY cover with foil.
  • Put in a 425 degree preheated oven.
  • I leave it in for 45-60 minutes.
  • Pull it out when you can squeeze it and its mushy.
  • The peel will come right off!
  • Put chunks into a blender.  Add however much liquid you need (I start with 1/2 cup water) to get the consistency you desire. 
  • OR I don't even use the blender anymore now that Rilyn is eating more "real" food.  It just takes longer to freeze.
My Cost: $.98/potato = $2.94
Amount: 48 oz
Baby Food Cost: $.98 / 4oz jar
Savings: $8.82!

Friday, January 14, 2011

Baby Food Friday


Welcome to Baby Food Friday! I've had several people ask me about how I make my own baby food, so I thought I would start talking about it here. Todays post is just about the basics and why I make my own, next Friday I'll start featuring a different food each week. A great resource is WholesomeBabyFood.com. Now that I have a few months experience, I have started doing things my own way or have learned easy tips.

Why Do I Make My Own?
  • Saves me a lot of money!
  • I know exactly what Rilyn is eating (no added preservatives unless I use canned -- but even then I'm choosey).
What Do You Need?
  • Ice cube trays (my favorite is the white Rubbermaid from Walmart -- yes it makes a difference! I tried more of a round, deeper mold but the ice cubes wouldn't come out.)
  • Blender or Food Processor (I prefer the blender)
  • Freezer Ziplock Bags
Yes, making my own baby food is time consuming but it is SO WORTH IT. I've learned to just do one food at a time; otherwise I'll be using all of my freezer space and trays for the first food.

A Few Other Tips I've Learned
  • If I introduce canned food first, that tends to be what she prefers, then she won't eat the food I made. So resist the urge to have them "try" the canned food first.
  • How much you'll get out of the food will change as you move into more solid food. In the beginning, I watered down Rilyn's food a lot so I got more out of it. Now, I use just enough liquid to mix up the food so it doesn't go as far.


Advantages to Ice Cube Method
  • Each cube is approximately 1+ ounces, allowing you to have an idea of the amount of food your baby is consuming.
  • There is minimal waste as you use only 1 cube at a time and will not have to toss away much food; such as you toss away when using commercial foods.
  • Another advantage is that you probably have ice cube trays on hand and will not need to go out and buy them.
Freezing and Storing
  • Pureeing homemade baby food is very simple. Cook the food, let it cool a bit, toss it into a blender or food processor and puree away.
  • Once blended, put into ice cube trays.
  • Freeze (at first I thought there was freezer burn on my ice cubes, but it isn't...its just the water coming to the top and freezing).
  • Label a freezer bag and pop all your ice cubes into the bag. Its that easy!
DaisypathAnniversary Years Ticker